

The most common question other than ‘how do you make cheese’ I get is what kind of equipment does it take? Great question with a not so simple answer.
The kind of equipment needed to make cheese largely depends on the kind of cheese that’s going to be made. I’m primarily making semi-soft, relatively fast aging cheeses, so my equipment list is fairly extensive and geared towards regularly making cheese. Making ‘fresh’ cheeses like Ricotta, Queso Fresco, Mozzarella and Queso Blanco requires very little equipment other than a pot, cheesecloth, colander, milk and rennet or an acid-based coagulant.
Semi-Soft/Hard Cheesemaking Equipment
Here’s a list of the equipment I use to make cheese.
- 5 Gallon Cheesepot, Stainless (for 4 gallon/4 lb. batches)
- 3 Gallon Cheesepot (for 2 gallon/2 lb. batches)
- Large Colander
- Long Slotted Spoon
- Long Balloon Whisk, Restaurant Style
- Fine Wire Mesh Strainer
- Small (10 x 12 or so) Bamboo Cutting Board (x2)
- Large Plastic cutting board (12 x 18 or so)
- Plastic cross-stitching backers to use as draining mats*
- Cookie Sheet for press drain pan
- Butter Muslin (3 pcs, 3 feet x 3 feet square)
- Curd Harp (wood framed wire device used to horizontally cut curds)
- Cake Tent (fine mesh cloth screen that sits over drying cheese to keep out dust and any stray insects that may get in the house.
- Digital Kitchen Scale
- 1/2 cup Glass Rammekan (x4)
- Dutch Style Cheese Press
- Mini-fridge or regular fridge
- External thermostat/controller for mini-fridge
- Cheese molds (for pressing)
Measuring Cups
1/4 cup
1/2
3/4
1
Measuring Spoons
1/32 tsp
1/16 tsp
1/8 tsp
1/4 tsp
1/2 tsp
3/4 tsp
1 tsp
1 Tbspn
Equipment Details and Explanations
The Cheesepot
The first piece of equipment you need is a cheesepot, which you may already have in your kitchen. This can be any non-reactive cooking vessel, such as stainless steel, enamel coated iron or glass.
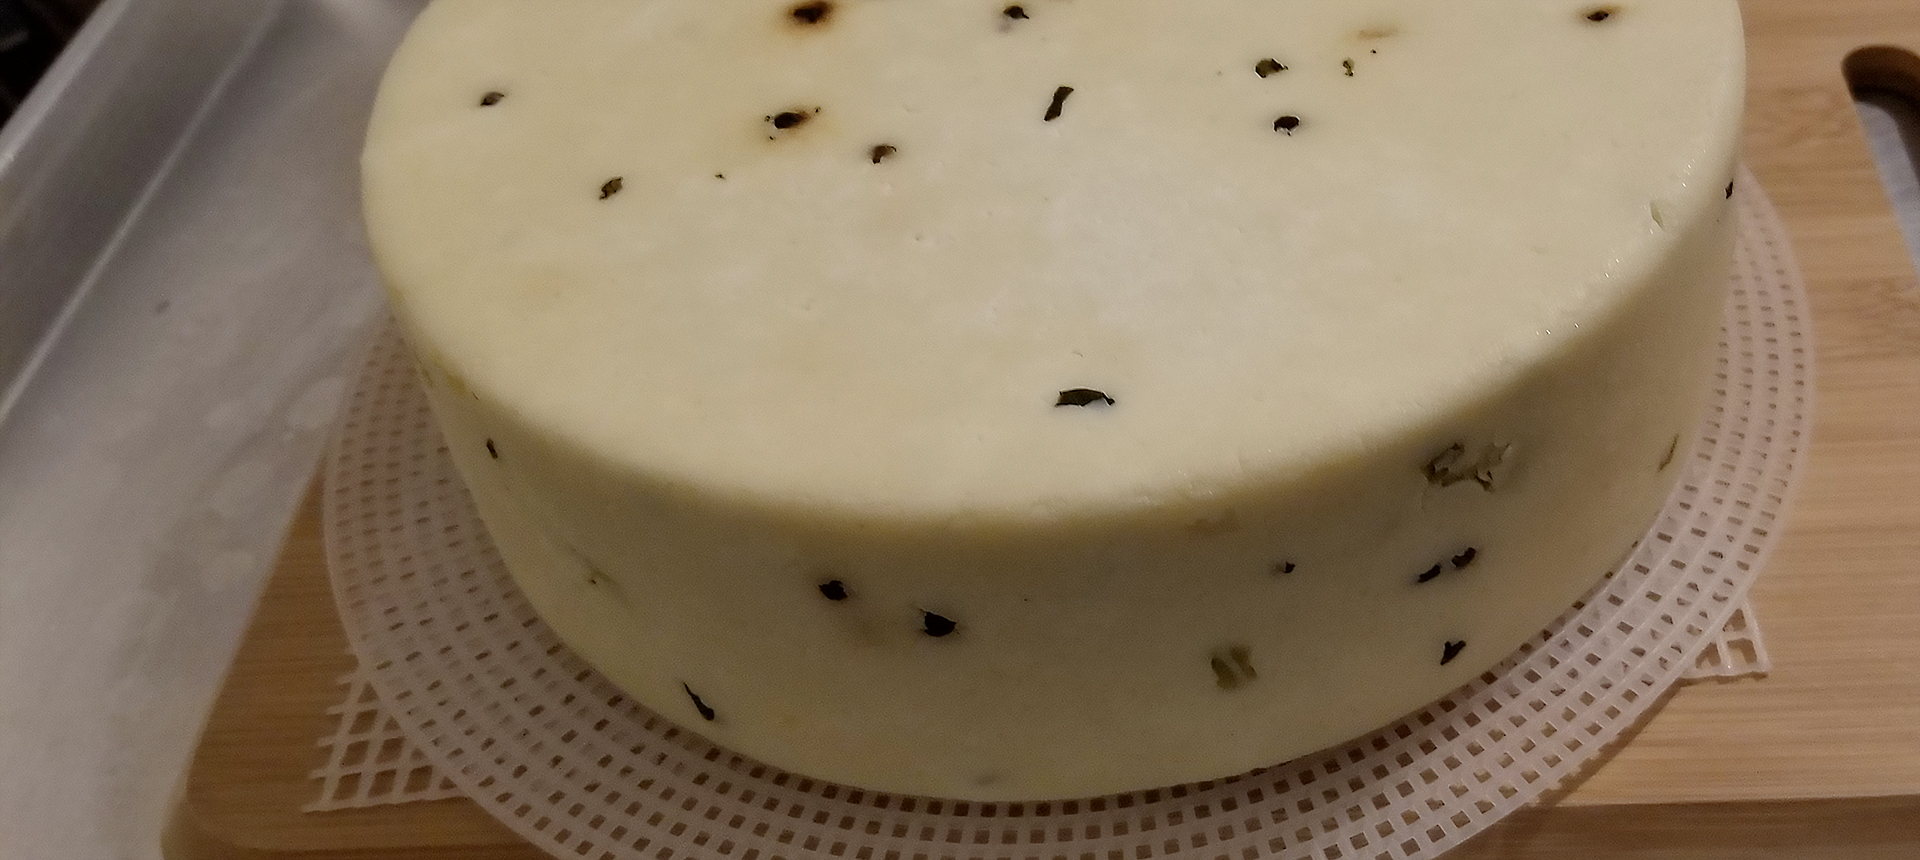
My suggestion is to get/use a pot that is one US Gallon larger than the batches you’ll be making. On ‘average’, each gallon of milk will result in about a pound of cheese. I normally use a five gallon pot so I can make 4 lb. batches, which result in a wheel about three inches thick and eight inches in diameter.
The thicker the bottom of the pot, the better, but the thicker the bottom also means the more you’ll spend. Budget accordingly. With water bath warming, you can get away with a fairly inexpensive pot and not scald your milk.
Colanders, Spoons, Whisks and assorted Accessories
In addition to a good cheesepot you’ll need the various utensils to make cheese, as listed above. Slotted spoons, measuring cups, spoons, a colander, etc. Try to get as many of these as possible made from stainless steel. They wont rust and if they’re not abused, will last through decades of cheesemaking.
Cheesecloth, Strainers and Draining Mats
At some point in this process the whey will have to be drained away from the curds using the process proscribed for the variety of cheese being made. Facilitating this involves a combination of straining/draining implements. It generally starts with the most coarse and progresses to finer degrees along the process.
Cheesecloth Specifics
The primary draining tool is cheesecloth, it helps retain as much of the curd as possible during the draining and pressing processes. There are several kinds, but the easiest to handle, best filtering and most durable is ‘butter muslin’. Unless a particular recipe calls for using a more coarse mesh, start with and use butter muslin.
Cheese Press and Molds
When I first started making cheese, I didn’t realize the importance of a proper press and molds. The type of mold you use is normally determined by the type of cheese you’re going to make. Manchego, for instance, uses a mold that imparts a basket-weave pattern into the rind, but Cheddar normally uses a smooth mold.
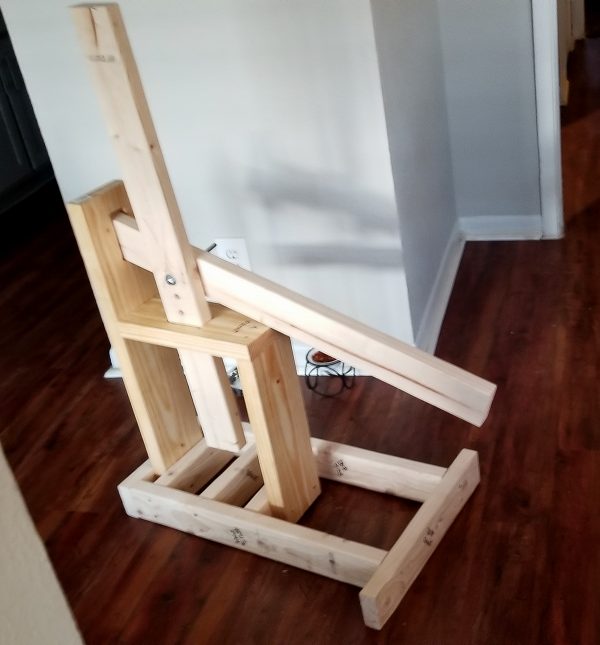
The Dutch-Style press I use is home-made and very crude, but functional. I’ve included a PDF download below of the plans I used to design and build it for those who may be interested.
A press will help apply the proper weights for the required amounts of time to achieve a good knit of the curds and smooth rind formation.
When I built my press, I did not have a saw to cut the lumber, but any place you buy the lumber at will be glad to cut it to size for you. I just laid out the lengths I needed and walked out with the pieces to build it. To cut the holes in the back and plunger support, I used a hole saw for the rough opening and a chisel to finish it.
Be sure to test your press if you build one. The one pictured above presses 25 lbs using a half-gallon of water in a milk jug hung on the end, 49 lbs with a full gallon and 97 with two gallons.
Molds come in a wide variety of shapes and sizes. The first cheese kit I bought came with a small mold and no follower and is intended mainly for draining fresh cheeses.
Buy molds that have followers, which will help in pressing, forming a uniform rind.. The standard mold I use is meant for 4-6 lb. cheeses and has a tight-fitting follower.
I have a couple other molds, but haven’t used them much.
Drying and Aging Equipment
Most aged cheese is given a period of time to ‘dry’ and develop a rind before real aging begins at cooler temperatures. To dry the cheese after pressing, I use plastic draining mats on top of a small cutting board. I was using mats from cheese supply companies ($4.00 ea.), but found they created impressions in the cheese when I wanted a smoother surface.
I stumbled across plastic backing for cross-stitching one day at a hobby store. The holes were smaller than the available draining mats and there were some large enough to make two mats from each for just 67 cents per piece.
Some ingenuity and re-purposing can save money on equipment you can use to make more cheese!
Cheese “Caves”
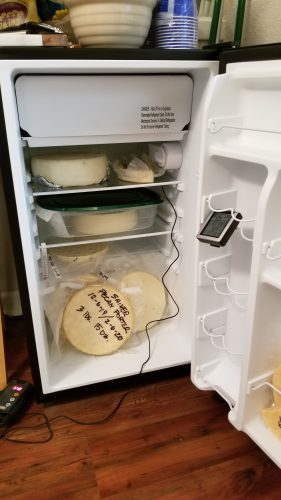
Cheese was and still is aged in actual caves in areas of the world where the climate is right. If you don’t have an actual cave, you can mimic one using a refrigerator controlled by an external thermostat. Without the thermostat, the temperature will fluctuate too much, in the range of 15 degrees F. A real thermostat will keep a much more stable temperature required for properly aging cheese, reducing the temperature swings to around 2-3 degrees.
Some wine ‘chillers’ are capable of maintaining a single temperature as well, but are generally more expensive than a small fridge with a thermostat. This one was $69 and I spent another $30 on the thermostat.